
Suspended interlocking flooring construction process
(PP modular suspended sports interlocking floor, standard construction procedure for basketball court, playground, multi-sport field)
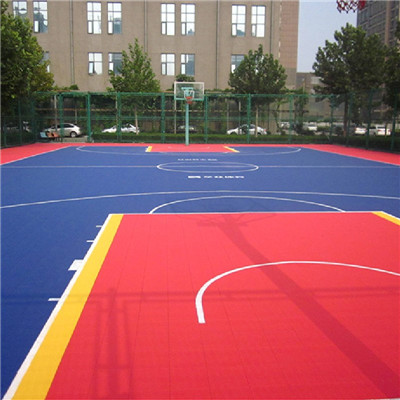
1. Pre-construction Preparation
Substrate Inspection & Treatment
The base surface (concrete / asphalt) shall be flat, solid, clean, dry, and free of oil, loose gravel and standing water.
Flatness requirement: ≤3 mm deviation within any 2 m span. Repair pits, cracks and raised areas in advance. Good drainage gradient (≥3‰) is required for outdoor sites.
Material Acclimatization
Unpack PP interlocking tiles and store them on site for 24–48 hours to adapt to ambient temperature, reducing thermal expansion & contraction deformation after installation.
Tools Preparation
Tape measure, chalk line, rubber mallet, utility knife / jigsaw, marker, broom, vacuum cleaner, edge strips, corner pieces.
Site Survey & Layout Planning
Measure the venue dimensions, mark out boundary lines and center reference lines with chalk. Confirm tile arrangement direction and color zoning according to drawings.
2. Snap Reference Lines
Pop perpendicular baseline lines on the substrate. Two common laying methods:
Corner starting method: Start from one venue corner, suitable for regular rectangular courts.
Center outward method: Start from field center, beneficial to control overall straightness for large venues.
Reserve 5–10 mm expansion gap along all surrounding boundaries to accommodate thermal expansion of PP material.
3. Tile Interlocking Laying
Place the first tile at the positioning point, keep all tiles with the same orientation (follow arrow marks on tile back).
Align male and female buckles of adjacent tiles, press down firmly; use rubber mallet to tap tile edge gently until a clear “click” sound indicates full engagement.
❗ Do not use steel hammer to avoid breaking lock structures.
Lay tile by tile row by row, keep seams tight and surface flush. Check flatness and straightness every several rows, adjust deviation timely.
When reaching walls, pillars or other obstacles: measure the remaining width accurately, cut tiles with cutter, polish cut edges smooth.
4. Perimeter Edge Installation
Install matching edge strips and corner pieces around the whole venue.
Edge pieces shall not be fixed rigidly; ensure reserved expansion gap is maintained to prevent arching in high temperature.
5. Overall Inspection & Adjustment
Check all interlocking joints: no loose tiles, no obvious gaps, no warped edges.
Walk over the whole surface; replace defective tiles immediately.
Clean all dust and debris between tile gaps.
6. Venue Line Marking (Optional for sports courts)
Attach masking tape according to standard sports dimension lines.
Use special two-component court marking paint for suspended flooring.
Peel off masking tape after paint full curing; avoid paint flowing into tile locking seams.
7. Acceptance & Handover
Check overall appearance, flatness, locking firmness, line accuracy and drainage condition. Complete construction acceptance.
Key Construction Notes
No glue or nails are needed; it is fully suspended floating installation.
Strictly reserve expansion gaps at boundaries; larger sites need additional intermediate expansion joints if required.
Do not construct in heavy rain or freezing weather outdoors.
Keep substrate well-drained to avoid long-term water soaking underneath tiles.
If you need, I can further simplify this text into short version for product catalog / construction specification document.