
How to properly install a fixed underground basketball hoop
1. Pre-Installation Preparation
Confirm installation position
The center of concrete foundation must be ≥600 mm outside the basketball court end line.
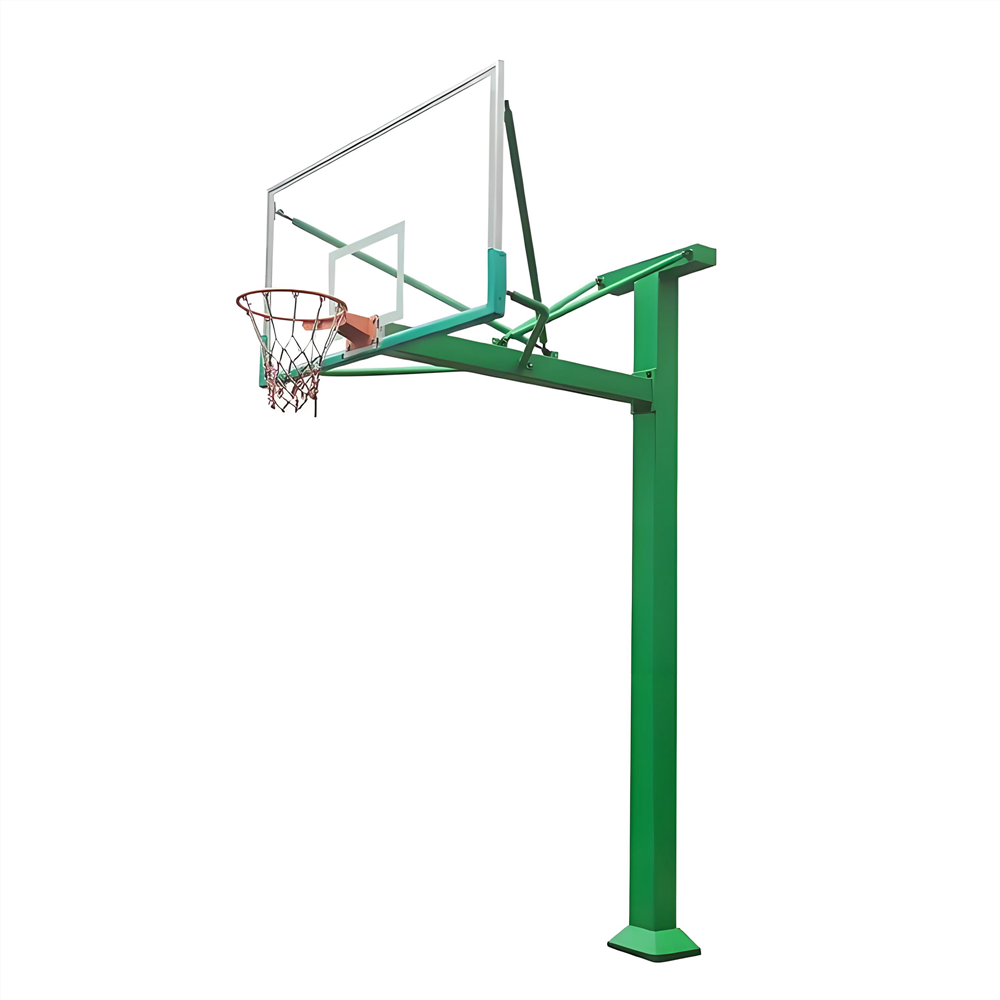
Keep enough space between pole and backboard, avoid collision during sports.
Check underground facilities
Confirm no buried water pipes, electric cables, gas pipelines in the digging area.
Prepare materials & tools
Excavator / shovel, level, tape measure, string line, wooden support frame, concrete (C25 minimum; C30 recommended), gravel, vibrator, wrench, anti-rust grease.
Check basketball hoop accessories
Anchor bolt assembly, main pole, backboard, rim, net, connecting brackets. Inspect for deformation or damaged threads.
2. Excavate Foundation Pit
Minimum pit size: 700×700×800 mm
Recommended standard size: 800×800×1000 mm
Frost-prone areas (North China): pit depth ≥1000–1200 mm
Soft soil / open windy sites: expand pit to 1000×1000×1200 mm
Compact the bottom of pit evenly; lay 100 mm thick gravel cushion for drainage.
3. Position and Fix Embedded Anchor Assembly
Place the anchor frame into the pit.
Use wooden supports to hold the anchor frame suspended, prevent sinking during concrete pouring.
Adjust horizontally with level tool: horizontal tolerance ≤3 mm.
Ensure anchor bolts stand vertically. Coat bolt threads with anti-rust grease and wrap with tape to avoid concrete contamination.
Important: Do not let anchor plate directly rest on gravel.
4. Pour Concrete
Adopt C25 or higher concrete; school public projects use C30.
Pour concrete in layers, use vibrator to remove bubbles, no hollow gaps inside foundation.
Keep anchor frame position unchanged during pouring.
The top surface of concrete foundation can be slightly sloped outward to drain rainwater away from the pole.
Foundation surface should be 0–10 mm lower than finished ground level.
5. Concrete Curing (Critical Step)
Minimum curing time: 7 full days
Recommended curing period: 10 days
❌ Do not mount main pole, do not apply any impact load before curing is complete. Early installation easily causes foundation shifting and pole tilting.
6. Erect Main Pole
Remove protective tape from anchor bolts.
Lift the main steel pole and align flange holes with anchor bolts.
Tighten nuts diagonally in several rounds to balance pressure.
Check verticality of the pole; vertical deviation ≤1‰. Adjust if tilted.
7. Install Backboard, Bracket, Rim and Net
Mount the support arm to the main pole.
Fix backboard firmly on the bracket.
Install basketball rim: standard height 3050 mm from finished ground to the top edge of rim.
Hang basketball net, check all connecting bolts and lock washers.
8. Final Safety Inspection
Retighten all bolts after 24 hours of installation.
Shake the stand slightly to check for loose parts.
Simulate slight impact; confirm no abnormal shaking or deformation.
Clean the site, remove construction waste.
Important Installation Notes
Never reduce pit depth or concrete grade to save cost; overturn risk will increase.
Reserved expansion space around concrete foundation; do not seal foundation tightly with hard pavement.
All exposed steel components should be maintained regularly to prevent rust.
If located in strong wind open areas, select larger foundation size to improve stability.